Shifora is an online schedule for your team. You view the roster, request leave, read the notice board and follow your team's calendar, on your phone and on your computer.
The versions
Free: the roster with monthly publishing, leave, the notice board, personal messages, the calendar and the link with your own calendar, for up to 15 people.
Paid: everything in Free with no limit on the number of people, plus preferences (desiderata), statistics, evaluations and assigning by an instruction to AI in the roster.
Custom: for a larger organisation with its own needs. Ask about it at info@shifora.be.
You see which version your organisation uses at the top of Settings.
Where to find what
This video introduces the home page (in Dutch for now).
At the top right are Home (the house), Messages (the envelope), Team (two people) and Help (the question mark). Under Go to (the four squares) you find Date polls and votes, Phone directory, Documents and links and Calendar; under My accountSettings, light or dark theme and Sign out. Point at an icon to see its name.
The menu holds Schedule, Swaps and Leave; in Paid your leave is under Preferences and Hours and Statistics are added. You find Evaluations under the Team icon. On your phone the menu sits behind the button with the three lines.
Schedule opens the roster straight away and Open shifts is a tab on Swaps; the number next to it shows how many open shifts still await your yes or no. A schedule proposal, student roster or self-scheduling period stays in the menu while it runs.
The administrator also has the Admin menu, with the same items for every organisation; each admin page shows the tabs of its item at the top.
If a drop-down list is long, for example with colleagues' names, type part of the name to search.
Starting your own team
If you already belong to an organisation, signing in opens it without starting another team.
On www.shifora.be, click Start for free and sign up with your email address and a password of at least 8 characters.
Confirm your email address with the link in the email you receive. Open that link in the same browser.
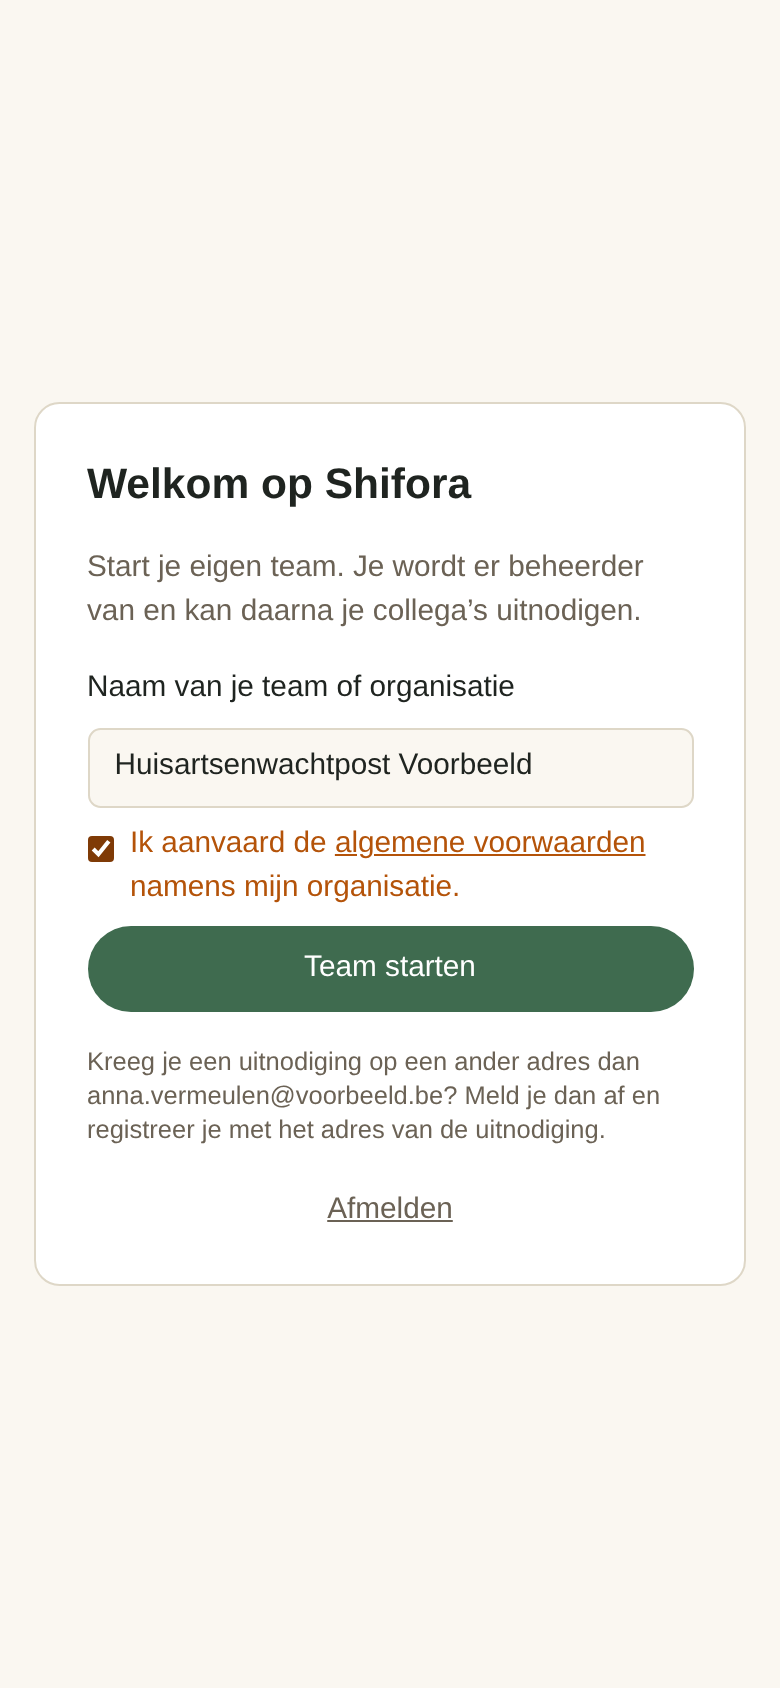
Give your team a name, tick that you accept the terms and conditions and click Start team. You become the team's administrator.
Each account can start at most 3 organisations per 24 hours.
On the Custom plan, Shifora creates your organisation and you receive an invitation by email as administrator. For the first 30 days Shifora support looks along, read only; you turn it off with Turn off at the top of Home or under Admin > Support.
The setup wizard
Next, in Set up your organisation, you go through the main settings. Save and continue takes you to the next step, Skip skips a step and with Later you park the wizard to look around first; Home then shows a reminder with Continue, which takes you back to the step where you stopped, and Don't show again if you no longer need the wizard. In Maatwerk the reminder stays until you submit the intake. You can change everything later under Admin.
Intake (Maatwerk only): questions about your organisation, the schedule, the functions and the rules for the solver. Each answer is saved straight away, so you can fill it in step by step; also later under Admin > Intake. With Submit intake your functions and scheduling rules go into Shifora and Shifora support receives your answers.
Organisation: the name, country, preferred language, time zone, date format, time display (24 or 12 hours), word for a shift and sector of your organisation.
Shifts and template: your roster columns, e.g. First on call, and for each column its shifts with name, hours and days, e.g. Day from 08:00 to 17:00 Monday to Friday. Each new month gets them as open shifts.
Job titles: the job titles in your organisation, e.g. Nurse. A colleague picks a job title from this list at the start, after that only you change it; if theirs isn't there, they suggest one. You get an email and add or reject it here under .
Inviting colleagues
Go to Team and choose the New colleague tab. Enter the email address and, if you like, the name, role and start date, and click Invite. Shifora only asks for an end date for the role Student. With your own emails you also choose the email; Shifora remembers it per role.
For someone without an account, enter the name and mobile under Colleague without an account; that colleague then appears in Team with "no account".
Click the name of a colleague without an account for the hours per week, the eligibility and the personal preference. You can also give that colleague shifts in the roster. If that colleague later signs up with the same email address, it carries over to the account, shifts included.
Several colleagues with the same role and period, such as a group of students? Click Another colleague and fill in name and email on each row.
One login for several people, e.g. the reception? Tick Shared account. The account only views the schedule and is not in the staff list. You decide who gets the password and are responsible for its use; for one person, create a regular account.
With the checkbox above Invite, the email only goes out a number of days before the start; without it, right away. You change the number of days in that same line; the line below shows the day the email goes out. Send now sends a scheduled email right away.
Five days before the start date, a welcome message with the name and role appears on the board.
Pick another day under Invite on, also later in the list. That way, for example, a staff member gets the email well in advance.
Your colleague gets an email with a personal link, chooses a password with Set password and is a member right away, without a second email. The link is valid for 14 days; after that, send a new invitation.
An invitation that has not been accepted yet shows in the list as "waiting to be accepted". Withdraw removes it. That colleague already shows in Team as "invited" and can already get shifts in the schedule; those shifts move to the account on sign-up.
Colleagues who have already signed in are collapsed at the bottom under Already signed in. Colleagues without an eligibility stay at the top with Eligibility still empty, except those not on the schedule, such as a shared account or a head nurse.
Click the name of a signed-in colleague to complete the eligibility right away.
Did the email not arrive? Your colleague can also sign up on their own with exactly the same email address. They then end up in your team automatically.
Home
Home shows at a glance what is going on.
At the top is the roster for one day, with a column per roster column. Use the arrows ← → or the date picker to go to another day. Your own shifts are highlighted; a shift without a name shows as "open"; if you may take it, click it to accept it or mark it Not for me. Click the hours of one of your own shifts that is over to enter overtime. Click a name for that colleague's mobile number, email address and job title.
Below it is your Next shift, and under On the agenda the next agenda item if it falls within two weeks; the calendar icon next to it opens the calendar.
Click My week ahead for your shifts and agenda items from tomorrow up to seven days later.
The Notice board shows the latest messages for the whole team. All messages shows the rest.
Under Calendar are the upcoming activities; the calendar icon next to it opens the calendar.
At the top of the notice board there is sometimes a Tip of the day. By default, at most one new tip appears every three days; the tick hides it until the next one. The admin creates their own tips and chooses how often they appear in Admin > Tips. A link in a tip is clickable; on a line of its own it becomes a button.
If your organisation works with hours, you see your hours for this month; enter overtime through Details.
If your mobile number or address, or a required profile photo, is missing, the notice board asks you to add it. In the month of the yearly reminder it asks you to check your details.
With the emergency starter pack the notice board also asks your preference for nights and weekends, until you answer.
If you may build the roster, the months still to be published are at the top of the notice board.
At the bottom, open Send a message to put something on the notice board or send it to one colleague.
If a month has not been published yet, you do not see that month's shifts here yet.
You choose which sections you see under Settings > Home page.
What's new?: the link is in the Contents box of the Shifora help, with the instruction videos below it. To get it as a message (email, push or WhatsApp), turn it on in Settings > Notifications.
The schedule
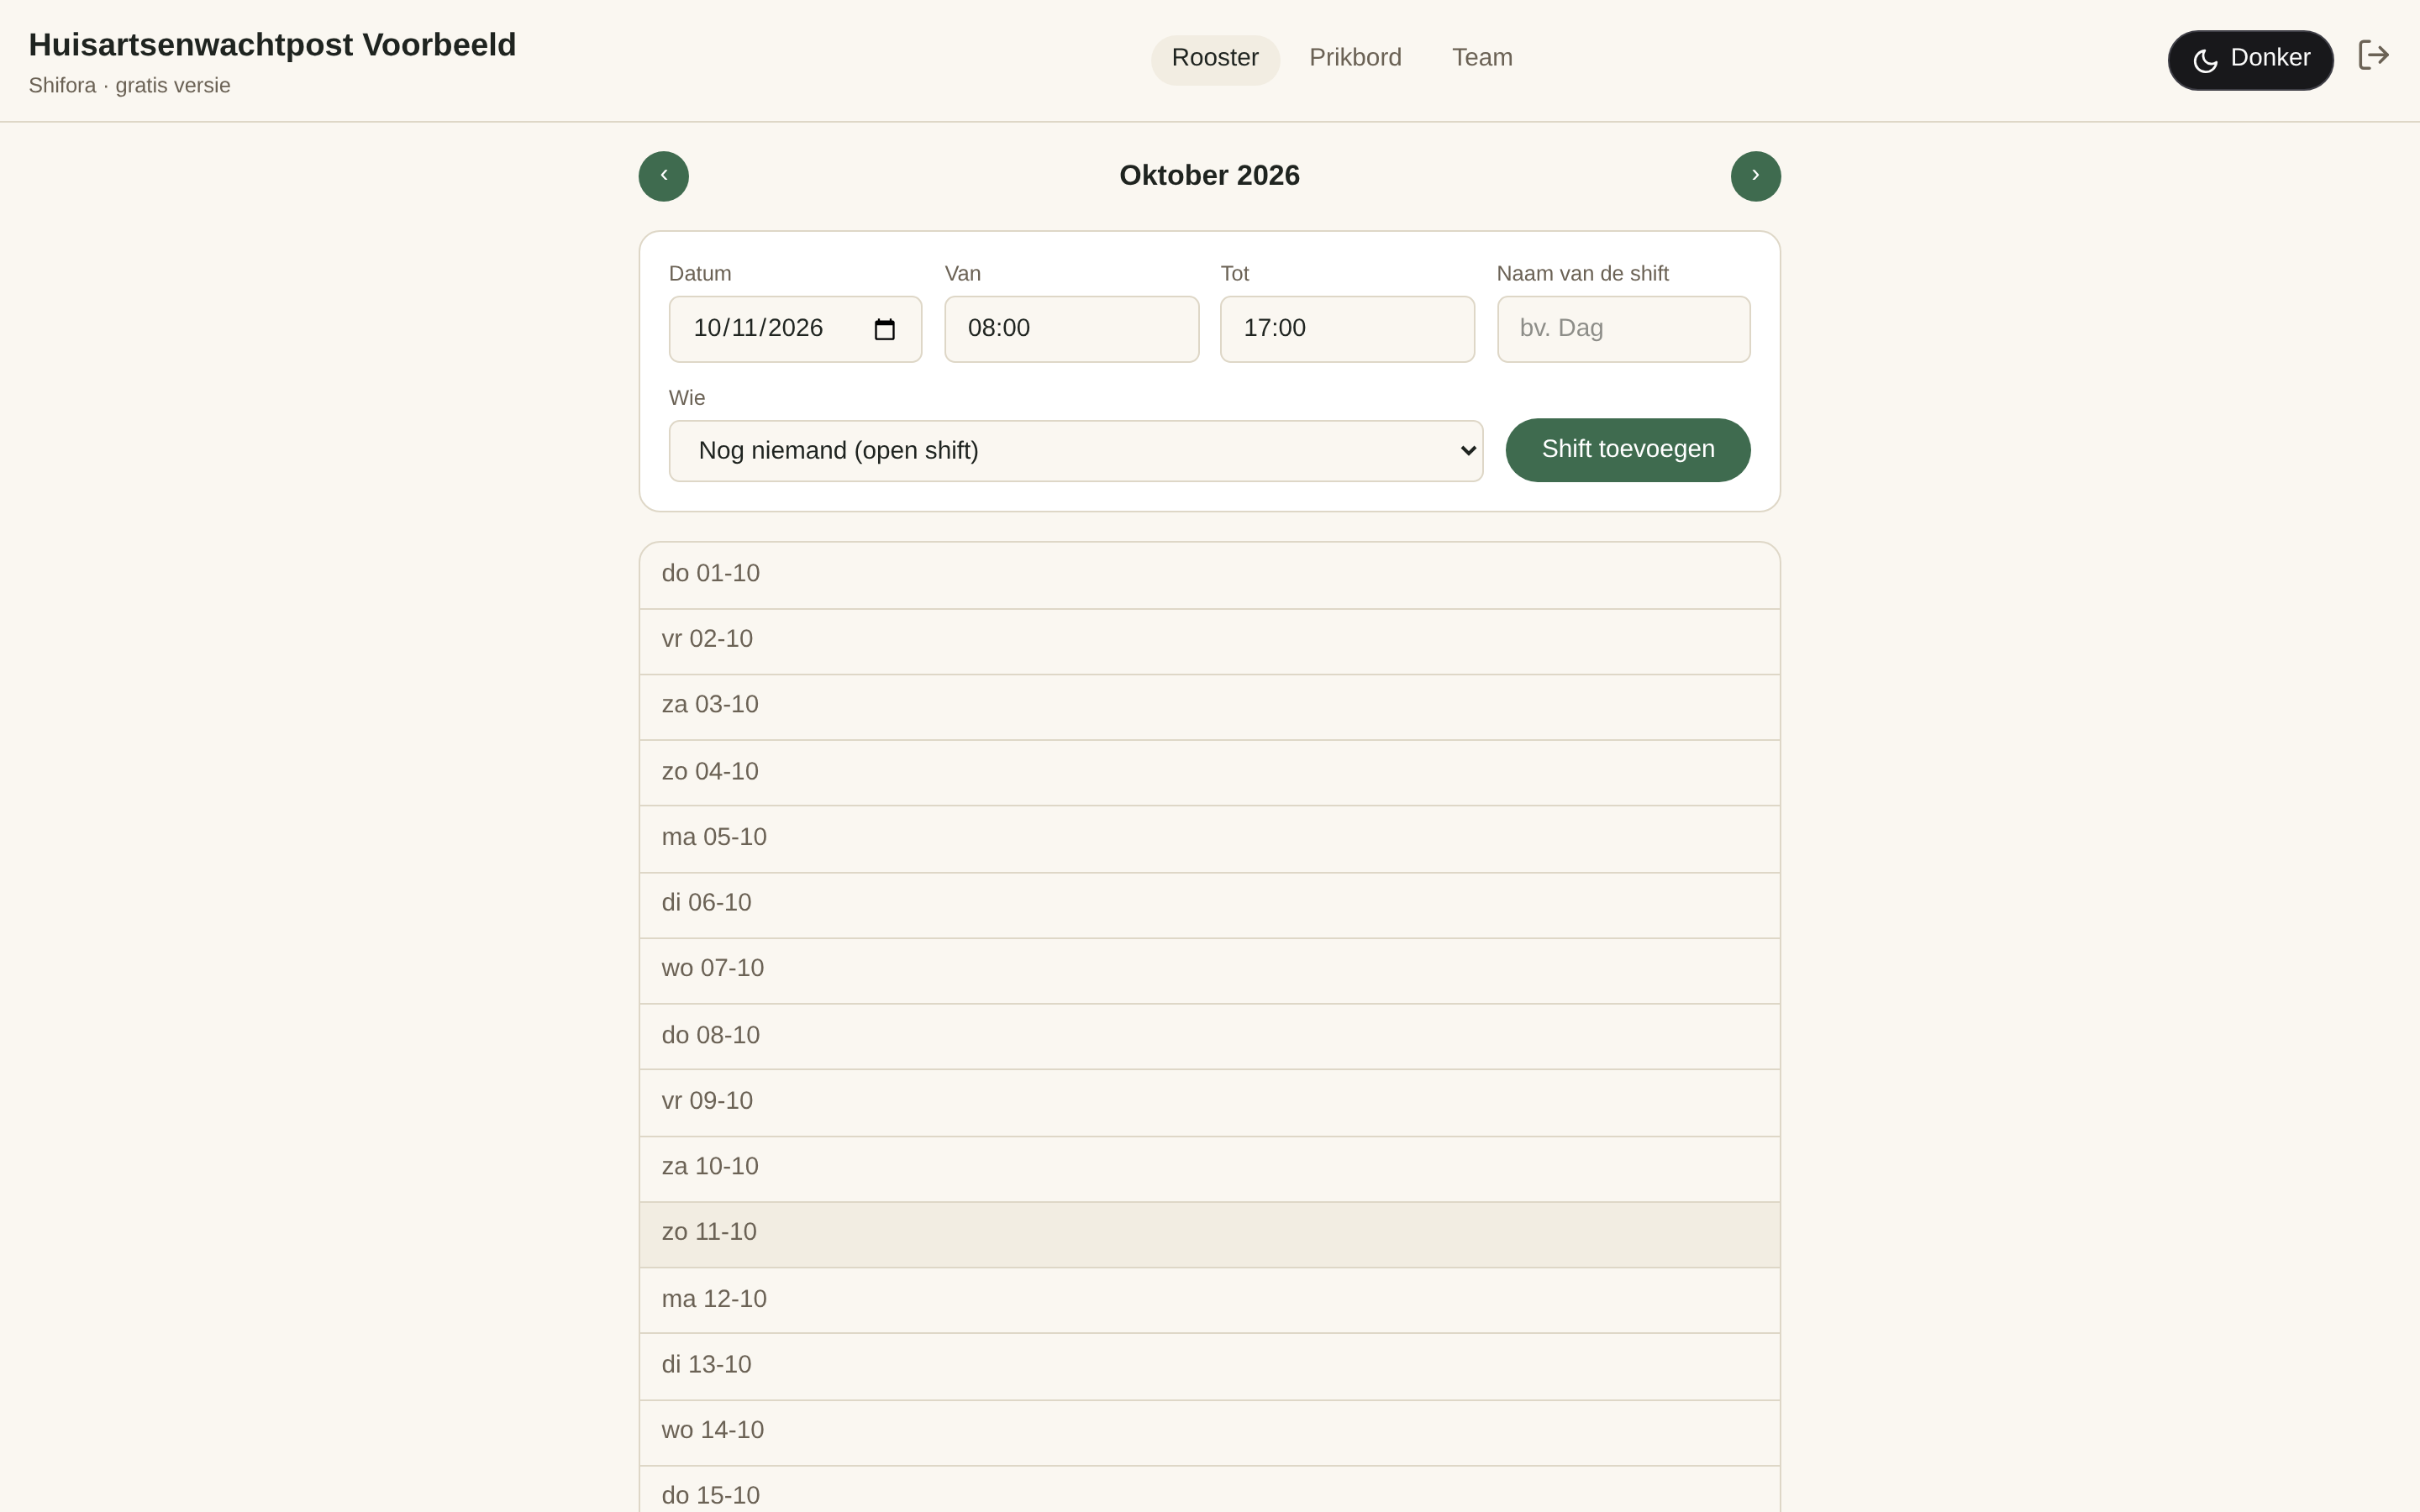
Under Schedule you see your team's roster, month by month, in a table with a column per roster column. Use ← and → to go to the previous or next month.
The My roster tab lists all your upcoming shifts.
Where possible, a shift shows why you are on it, e.g. "Taken over from Jan" or "At your request (want to work)". Shifoor gives that reason too.
Your colleagues only see a month once it has been published. Shifts left open on purpose are not shown.
If you may build the roster, set the switch at the top to Edit (the pencil) to add, delete and publish shifts. A column with a fluorescent yellow dot is not validated yet and does not show in View (the eye); click Validate.
Building the roster
Schedule with the switch set to Edit is the work screen for whoever makes the roster: the administrator or whoever received the Create and publish the schedule permission. It shows a whole month in one table, with a row per day.
Click a cell and choose a name from the drop-down list. It only holds colleagues who may work that shift according to their eligibility, ordered by their availability. Your choice is saved right away.
On a phone each day is a block with the columns in rows of three; tap a name or a time to change it.
To remove one shift: click its hours and choose Delete this shift.
On the right are the statistics per person, so you can share the shifts fairly. Click a name for that colleague's role, hours and preference. In Paid you also find a tab there with the team's preferences.
Admin > Schedule setup holds the columns, the fixed shifts, the template and the limits of the roster (see Using a template). If you may build the roster without being an admin, you find the template and the settings under Schedule setup in the menu. If your roster has no shifts yet, Schedule in Edit mode points you there.
At the bottom is Notes: one note per month, only for whoever builds the roster. While a proposed roster is running, you can also read and write it under Conflicts.
Validating
Click Validate when the month is ready. If there are still conflicts or open shifts that must be filled, you first see them under Before you validate.... Validate anyway carries on regardless.
A validated month gets the Validated label and is visible to your team.
The Actions menu
Undo and Redo reverse your latest changes or apply them again.
Save saves the current state, optionally with a name. Under Earlier versions you restore a saved version.
Clear roster removes all names from the month. You can undo that afterwards.
Add shift manually adds an extra shift to the roster.
Delete shifts removes all shifts with the same name from the roster, in all months.
Remove validation takes a validated month out of your team's view again.
Schedule proposal (Paid and Custom)
Sometimes the administrator first shows a month as a proposal under Schedule proposal in the menu. Until the deadline, mark what is wrong with each of your own shifts.
If you are in a redistribution, choose who does each shift of the group and click Redistribution done.
Two days before the deadline you get a reminder by email.
When the administrator answers your conflict, you always get an email. The answer also appears on My proposed roster.
At the top of the proposal you see your received versus requested hours, your nights and your weekends next to your team's average.
On the My statistics tab you compare your hours, nights and weekends anonymously with your team.
For the administrator
On Schedule, in Edit mode, tick Proposal to show the month to your team as a proposal first. Once your team has responded, close it on the Admin tab. The Steps button next to the box takes you there. Removing a month from a published proposal asks for confirmation first.
On the Admin tab of the Schedule proposal you publish the proposal with an email to your team, and make it final after your corrections. What your team reported is on the Conflicts tab.
On Conflicts you reply to a report with Answer, using a standard answer, your own text or both. The answer is always sent by email.
Conflicts is grouped per month, with comments on the whole period at the bottom. What colleagues thought is shown per phase. You reorder comments by dragging them, on a phone by the handle ⠿.
On the Redistribution tab you choose colleagues, a period, a deadline and optionally your own text in the email. They divide their own shifts among themselves.
Using a template
With a template you create a fixed pattern of one or more weeks and put it in the roster as open shifts in one go. You find it under Admin > Schedule setup, tab Template. The fixed shifts on the Shifts tab come every month by themselves; a template you apply to a period yourself, and it takes precedence there.
In short
1. Create a template with a name.
2. Put the shifts of one week in it, day by day.
3. Copy days and weeks until the pattern is right.
4. Apply the template to a period: the shifts go into the roster as open shifts.
5. Fill in the names in the roster, or let the team fill them in.
Creating a template
Give the template a name (e.g. Base schedule) and click New template.
Each week has a box per day, from Monday to Sunday. Click + next to a day, fill in the name and the start and end time of the shift and click Save.
Copy copies a day to other days, Copy week copies a whole week to other weeks. Whatever was there is replaced.
If your roster has several columns, you choose the column for each shift.
If you work with a cycle of several weeks, add weeks with Add week. Delete week removes one.
Applying the template
Under Apply to the schedule, choose a start and end date, at most 400 days apart. Type the date (e.g. 1/1/2027) or pick it with the calendar icon. For a cycle, choose under Start with week which week the period starts with.
Tick First clear open shifts in this period to replace an earlier attempt. Shifts with a name always stay.
Click Apply. The shifts go into the roster as open shifts; then you fill in the names.
A validated month is skipped; remove its validation first if you want to fill it anyway. A shift that is already there is not added twice.
Swaps and open shifts
Under Swaps you give away or swap a shift with a colleague.
On the Swap tab you choose what you want to do; Overview has the tabs For me, My proposals (in fluorescent green) and Completed. Completed and All swaps show swaps from this month on; all earlier ones are under History, by year and month. A number next to Swaps in the menu shows how many proposals are waiting for you.
Whoever builds the roster also sees All swaps. With the I want to change a colleague's shift card, the admin carries out a swap or split straight away. Whoever builds the roster can do so for a split.
While your request awaits an answer, it is on your Home under My swap requests; you can also withdraw it there.
First choose whether you give away, swap or take over a shift. Then choose your shift and a colleague or Everyone (open offer). Only colleagues who may work the shift are in the list.
After Take over on an open offer you first see what happens and then confirm. Under Split you immediately see who gets which hours.
With Ask in free text you type what you want, e.g. "I want to swap my Friday shift with Jan". You first see what Shifora understood; only Confirm and send sends your request.
Want a shift back from anyone? Choose I want to swap a shift with Everyone. A colleague offers one of their shifts under For me with Offer a swap; you confirm or decline, and after a decline your request is open again.
Your colleague gets an email and confirms or declines. Once confirmed, the roster is updated straight away. If a shift goes to someone else in the meantime, the proposal lapses and both colleagues are notified.
The email about a swap, exchange or open offer has an Accept button (Take over for an open offer). It opens a short confirmation; you do not need to sign in. For a swap request the button is Offer a swap and you choose your own shift there.
Under Swaps > Open shifts, on the For me tab, you accept a shift without a name, or click the red X (not for me). On the Manage tab the admin assigns someone who may work the shift.
With Accept part (Paid and Custom) you accept only the start or the end; the rest stays open and is announced again.
Team self-scheduling
Instead of building the roster yourself, you can let the team pick its own shifts. Then you fill the gaps and validate.
For the administrator
In Schedule, in Edit mode, open the Self-scheduling tab. Choose the column, the period and, if you like, until when the team can fill in, and click Open.
Put open shifts in that period first, for example with a template.
In Paid you can also set rules: a minimum and maximum number of shifts per person, and a maximum number of nights or weekend shifts. Two days before the deadline, whoever has picked too few gets an email.
When every shift is taken, you get an email. Click Close to stop early.
Filling in yourself
When a period is open, you see it on Home and under Self-scheduling in the menu.
Click Take next to an open shift. Click Release to free it again while the period is open.
You can only pick shifts your eligibility allows and that do not overlap another shift of yours.
In Paid, each period has a message box for the whole team, for example to swap.
Student roster (Custom)
Students with the same start and end date form a group and share out their shifts together under Student roster in the menu, as long as their group is not validated. After that, the administrator finds it under Admin.
For the administrator
Invite a student with the role Student and a start and end date. For a member, change both by clicking the name in Team.
On the Manage tab of the student roster, choose the students' column, and for each template say how many students it is for. The hours are in the template's shifts.
Shifora sets up a group's shifts automatically, as many days before the start as the invitation, and emails the students. Set up shifts does it earlier.
A week later the students get a reminder if less than half of the shifts have been taken, and another one four days before the start if the roster is not complete. The administrator gets a copy each time.
The emails ask students to contact the administrator if they run into problems.
When you are told a group is ready, check it and click Validate.
The Manage tab also lists the validated periods, who validated them and a link to the roster.
For students
At the top are the points of attention and a counter of your shifts per type; Overview at each group shows the split.
For each shift, choose your own name or that of a fellow student from your group. Clicking a name shows phone and email.
At the bottom, the message box lets you send a message to the administrator or a fellow student.
When the roster is mostly filled in, click Roster is ready. After validation it is fixed.
Eligibility: who may work which shift?
Eligibility determines which shifts someone may work. Someone without an eligibility may work every shift.
For the administrator
You set them up on the Team page, Eligibility tab.
Give an eligibility a name (e.g. Nights only) and click Add eligibility.
Under Shifts, tick the shifts that belong to the eligibility. If a shift is not listed, type its name under Other shift (name). If your roster has more than one column, also choose the Columns. Nothing ticked means everything.
Under Eligibility per member, tick the eligibility for each person. With more than one eligibility, someone may work the shifts of all those eligibilities.
Under Admin > Job titles you choose a default eligibility per job title, e.g. Intern for the interns. A new colleague with that job title gets that eligibility, and so those shifts, automatically; anyone who already has an eligibility keeps theirs. An eligibility with the same name as the job title, such as Student, applies by itself.
Everything is saved right away. Delete removes an eligibility.
In Schedule, in Edit mode, the drop-down list of a shift only shows the colleagues who may work that shift.
Under Temporary unavailability you note a period in which someone can work fewer or no shifts, e.g. No nights for a few months. The schedule and the scheduling assistant take it into account (without an impact it counts as no shifts), and the team directory shows an exclamation mark next to the name. Do not mention a medical reason in the note; the impact is enough.
Requesting and approving leave
You request leave under Preferences, tab My leave. Without preferences that page is called Leave.
Click a day in the calendar or drag over several days, or click wk for a whole week. Clicking again withdraws the request.
To add a note, open Leave with a note and fill in From, To (inclusive) and your note.
Statistics shows how much leave you requested and got this year, next to the team; Leave taken lists the past per year.
Whoever may approve leave gets an email. Your request stays "pending" in light blue until a decision is made; approved leave is dark blue.
After the decision you get an email. If it is declined, the reason is included; if it is approved, the email goes out two hours later.
Withdraw removes a request that has not been approved yet. Approved leave can only be withdrawn by whoever approves leave.
While you pick the days, a traffic light shows how heavily your request weighs next to the team's leave.
You turn off the email for approved leave under Settings > Notifications.
For the administrator
This is done by the administrator, or by whoever received the Approve leave permission, on the All leave tab.
When a colleague requests leave, you get a notification within fifteen minutes; choose the channel in Settings > Notifications.
A table shows each colleague's leave per day; choose one or more roles at the top. The Risk column warns when many colleagues are on leave at once.
Click the light blue cells in the table to approve or decline several requests together.
Leave requests lists the requests per colleague: approve with the tick, or decline with the cross and a short reason.
Undo sets approved leave back to pending. Within two hours of approving, no email goes out then.
Under Enter leave you type leave for yourself or a colleague, e.g. "Jan is on leave from 3 to 7 March".
Each request has a dot with its traffic light and how much leave that colleague already took this year.
Whoever builds the roster also sees a pending request in the roster, as "leave requested".
Preferences (Paid)
In Paid, under Preferences, you indicate per month when you can't work, would rather not, or would like to work. Whoever builds the roster then takes it into account.
This video shows how to enter preferences (in Dutch for now).
Choose the month with ← and →, or click the month. The page opens on the first month you can still enter preferences for.
Each day has a block per shift of your team, e.g. 07–15, 15–23 and 23–07. A day runs from 08:00 to 08:00, so the night on the right is the night after that day.
On a computer, click a block to change its colour: can't → rather not → want to work → empty. Drag over blocks or days, or click day or week, then choose in the small menu.
On a smartphone, tap Set under a day and tap the blocks, or Colour the whole day. With Several days you pick a whole period at once.
Everything is saved immediately. Undo reverses your last change.
Below the calendar you can also type what you want, e.g. "I can't work on 5 January". Shifora puts it in the calendar.
You get a reminder two weeks before the deadline and the day before.
You request leave on the My leave tab.
The traffic light
At the top right is a traffic light: the more preferences, the more it goes from green to orange, red and flashing red.
Weekends, public holidays and days in the school holidays weigh more. From the second weekend in which you block both Saturday and Sunday, extra is added.
Leave spanning two consecutive weekends weighs extra.
Green on weekends or public holidays, and more green nights than you usually get, give a bonus.
Hover over the traffic light or tap it to see why it has that colour.
It looks at the period of the deadline, without a deadline at the next four months. The past four months show a traffic light too.
The day after the deadline you get a message with the colour of your traffic light.
Under Statistics you can view your preferences profile.
If the administrator set a maximum, you cannot enter more red preferences or days of leave.
For the administrator
The All preferences tab shows in one table what each colleague entered, also those without an account. Unlock the padlock to change a day or block of a colleague.
The notice board
The Notice board is for messages to the whole team, in every version. It sits together with your personal messages on the Messages page.
Open Messages with the envelope at the top, or Send a message at the bottom of Home.
Under To whom? choose Everyone (notice board), write your message and click Send. Your whole team sees it right away, newest at the top.
A link in your message becomes clickable automatically. With Link and Button text you get a button below your message.
With Until which day? your message disappears by itself after that day; you may leave it empty.
Home shows the latest messages; All messages shows the rest.
The green tick archives a message: it disappears from your Home and moves to Archive on Messages.
Delete removes your own message.
Reply answers the writer personally.
Sometimes a short question about Shifora appears on the notice board, at most once a month and only after you start. Answer with one click or choose Not now. You can give feedback yourself via Settings or at the bottom of this help.
For the administrator
The administrator, and whoever received the Manage the notice board permission, removes any message with Delete. The Manage tab of Messages lists every notice board message.
The Log tab shows the administrator every message, including deleted ones.
On the Manage tab you post a message for one function, working group or target group only via Visible to; empty means everyone. You can also mark it Important or schedule it with Show from which day?.
Under Which message? pick a standard message as a starting point. The administrator creates them under Standard messages.
In Paid and Custom, Always email emails the message to every member, also to those who turned notifications off.
Personal messages
Under Messages you send a message to one colleague. It does not go on the notice board.
Under Send a message, choose a colleague under To whom?, optionally fill in a subject, write your message and click Send.
In Betalend and Maatwerk you can also choose a working group; each member gets the message separately.
In Maatwerk you can also choose a target group; each member gets the message separately.
Only you and the recipient can read the message, not even the administrator.
New messages are under To you on the Messages page, above the notice board. The number on the envelope at the top shows how many you have not read yet.
The green tick moves a message to Archive; Sent holds your own messages.
Delete removes a message, for you and your colleague.
Reply opens the conversation as a chat: your messages on the right, your colleague's on the left.
In Paid, tick Also by email to email the message as well.
Whoever turned off notifications for messages in Settings gets no email, unless the administrator ticked Always email.
The calendar
Under Calendar you find your team's activities, such as a team meeting or a training, in a monthly calendar.
A dot on a day means something is planned. Click the day to see the activities with their time, location and description.
Below the calendar are the upcoming activities and what each colour means. At the very bottom, open Past activities by year and by month.
Use the arrows to go to another month. Click the month to pick another month or year straight away.
An activity is for the whole team, or in Maatwerk only for a target group. It also appears in your own calendar if you use the calendar sync (see Settings).
The deadline for preferences appears there by itself, with a red dot. Anyone not on the schedule does not see it.
If the administrator picked you for a category, you add and edit items there yourself with New item.
For the administrator
Choose a day, click New item and fill in at least a title and a date. Start and end time, location and description are optional. Click Save.
Edit changes an activity, Delete removes it.
With the permission Manage the department calendar (Management > Permissions) someone else also manages all activities.
Under Manage you choose per category who may add items, without managing the whole calendar; the list also adds a whole function or working group at once. The person you choose gets a message and an email.
Under Manage you also create your own categories, each with a colour. Without categories, a new item does not ask for one.
Documents and links (Betalend)
Under Documents and links you find your organisation's documents and useful links, by category, in the tabs Own documentation (minutes, procedures) and Background and links, plus the views the administrator made. The search field searches every tab. You only see what is meant for everyone, for your job or for your working group. The categories are collapsed: click a category to open it; when you search they open by themselves. Click a title to open the document.
For the administrator
You add documents with the green Upload document button at the top of the Manage tab.
Enter a title and choose either an External link or a file with Choose file: PDF, Word, Excel, PowerPoint or an image, up to 10 MB.
Choose the tab: Own documentation or Background and links.
Tick one or more existing categories or type a new one; without a category the document goes under "General".
Under Audience, choose the jobs, working groups or target groups the document is meant for. Nothing chosen means everyone.
The Manage tab lists the documents by category. With Edit you change the title, the link and the description. With Tab and category and Visible you change the tab, the category and the jobs or working groups; who can see a document is only shown here; you can also delete a document there, which erases an uploaded file too. Drag a document by the handle ⠿ to set its order within the category; everyone sees them in that order.
With Message you give a document a short text. Tick On the notice board at first sign-in and a new colleague gets that text with the link on the notice board.
Under Order of the categories you drag the categories themselves.
Under Custom views you make an extra tab with the documents from chosen categories, e.g. "Procedures". Drag or delete a view there; the documents stay.
Phone directory
Via the phone icon at the top you find your organisation's phone directory, by section, in every version. Search by name or number and tap a number to call.
For the administrator
You add, edit and delete numbers on the Manage tab of the same page. With Important a number shows in red.
Hours and overtime (Paid)
If your organisation works with overtime, Hours is in the menu.
Per month you see your shifts with their hours, your overtime and the total, on the same page as spoed MM but without a split per site.
Stayed longer or started earlier? Open the Overtime tab (next to My hours), choose the shift, fill in when you actually started and stopped and click Enter overtime. You can also write it in the text box below. If there is already overtime that day, Shifora first asks whether you are sure. From Home, click the hours of your own shift.
Stopping earlier or starting later counts as negative.
A night across the clock change really counts an hour shorter or longer and gets the notice Clock change −1 h or +1 h.
Shortly before the end of the month you get a reminder to check your hours. The notice on the board disappears as soon as the month is validated, otherwise on the first day of the next month.
Once the month is validated, new overtime counts in the following month.
If your organisation counts day and on-call hours separately, you see them separately.
For the administrator
The Everyone tab shows the whole team; click a name for the shifts with their planned and actual times, and expand that window to full screen with ⤢. Validate month closes the month, Download hours lets you pick Excel or PDF. The new month becomes the first tab of this year's Excel that Shifora keeps, of your own Excel or of a new one. With Email to payroll and Send, Shifora sends the Excel and the PDF to the email address you fill in on the Admin tab. You see the email first and can still edit the text; set a standard text on the Admin tab too. Test email to me sends it to you first, First working day at 8:00 sends it only then; all colleagues with hours that month are in cc. Until then there is a message for you in Shifora; once sent, you get a notification as chosen in Settings > Notifications. On the Admin tab you choose whether totals are rounded to the whole hour. If the month is not validated yet, Shifora warns you when downloading. This year's Excel is also under Documents and links for the roles that resemble staff member, emergency physician, head of department or gatekeeper.
On the tab you approve or reject overtime, enter overtime for a colleague and choose whether colleagues enter it themselves and whether it needs approval. There you also set whether day and on-call hours count separately, from and until when on-call runs, and whether weekends and public holidays count.
Evaluations (Paid)
Under Team > Evaluations you evaluate colleagues anonymously. Nobody sees who wrote what. Details in your text can still identify you. The person being evaluated sees nothing, unless the organisation turns on the About me tab: then they read the completed evaluations, without names.
This video shows how to submit an evaluation (in Dutch for now).
On the To do tab, each evaluation you still need to complete is a card with the deadline. Click it: your own notes about that colleague are at the top, the form below. You can update your evaluation until the deadline.
Nothing to report? Click Submit empty form. If something is already filled in, Shifora asks first whether to continue.
As soon as an evaluation opens, you get a message on your notice board and an email or push notification, with the colleague's photo. A week before the deadline a reminder follows if you have not filled it in yet.
With the Interim evaluation of a colleague card you write a short note at any time, or click their name in the roster on Home. Your notes are listed per colleague under My notes; as long as they are not part of a completed evaluation, you can delete them.
For the administrator
On the Management tab, under Settings, the administrator turns evaluations on or off and chooses which job titles get evaluated and which evaluate by default. If they are off, turn them back on under Management > Evaluations.
With Completed evaluations visible to the person evaluated, a colleague reads their completed evaluations on the About me tab and in Download my data, without names. It is off by default.
Under Access per role you choose which job title may read the evaluations without managing them, e.g. the head of department all of them or the GP trainees' trainer only theirs.
Under Form per role you set your own criteria for a job title, e.g. the CanMEDS form for emergency medicine residents. A new evaluation of a colleague with that job title takes them over.
The administrator and anyone with the View evaluations permission plan evaluations on the Management tab and see the results on the Overview tab. If the permission covers only some groups, only for colleagues in those groups.
Under , choose the colleague, the moment (midway or end), the end of the period and the deadline. It appears for evaluators two weeks before the deadline. In an emergency department in Maatwerk, Shifora plans a GP trainee midway and at the end by itself, and an emergency medicine resident and a student at the end. Tick which job titles evaluate; nothing ticked means everyone. Put one criterion per line. The criteria of the previous evaluation are already filled in; an emergency department in Maatwerk starts with the medical roles.
Statistics (Paid)
In Paid, under Statistics, you find your own figures, as in spoed MM:
Shifts and hours: your shifts, weekend shifts, nights and early shifts.
Proportions: which share is weekend, night, early or holiday, next to the team median.
Comparison with colleagues: bars per 100 hours worked, anonymous.
Leave and Preferences: your leave days and preferences compared to the team.
Use ← and → to choose another month, or Period from and up to and including for a longer period. Only published months count. At the top is a table of contents by topic.
For the administrator
The Everyone tab shows each colleague for the period and a chart of hours and overtime per month; choose a colleague to see their statistics.
The Christmas and New Year tab shows who worked the last year-end holidays, with a suggestion for the next.
You also see the months that are still in draft.
In Admin > Job titles, choose a statistics group per job title. People whose job titles share a group are compared with each other; without a group, that is the whole team.
Ask Shifoor
Shifoor is Shifora's chat assistant. Click his face at the bottom right and type your question in plain language.
Ask how Shifora works, e.g. "How do I request leave?" He answers based on this help.
Ask about the roster, e.g. "When do I work next week?" or "Who is working on Saturday?"
Withdraw your own swap request, e.g. "Withdraw my swap of 14 October". It is only withdrawn after Confirm.
Split a shift, e.g. "Split my Saturday shift at 3 pm, An takes the end". Your colleague confirms; when the admin does it for two colleagues, it goes through straight away.
He also prepares your own desiderata, e.g. "Red from 10 July 2 pm to 11 July 10 am". They are only saved after Confirm. He also prepares leave, e.g. "Leave from 3 to 7 March"; after Confirm it is pending until approved.
In Free you have 5 conversations a month, in Paid 20. A conversation counts from its first question.
Each organisation has a monthly budget for Shifoor. When it is used up, Shifoor pauses until the end of the month.
If looking things up or a card doesn't work for a moment, Shifoor still answers with explanations from this help.
If the connection drops during an answer, your question is put back in the box so you can send it again right away.
Ask what is in the agenda, e.g. "When is the next team meeting?"
If you are an administrator, he also puts an activity in the agenda, e.g. "Team meeting on 20 November at 2 pm". It is only added after Confirm.
If you are an administrator, he also creates a calendar category, e.g. "Create a calendar category Training in blue". It is only added after Confirm.
He also changes or deletes an activity, e.g. "Delete the rehearsal on 30 November". That too only happens after Confirm.
As an administrator in Betalend or Maatwerk he also creates working groups or adds someone to one, e.g. "Put An in the Quality working group". That too only happens after Confirm.
If you make the roster, he also puts names on shifts, e.g. "Put me on every Saturday in November" or "Set all December shifts to deliberately open". It is only in the roster after Confirm.
Shifoor only sees what you can see yourself and saves nothing else for you. He does pass on feedback about Shifora if you ask him to.
On a computer, Enter sends your question and Shift+Enter starts a new line. On a phone, Enter starts a new line and you send with the arrow next to the text box; it lights up fluorescent as soon as a question is ready.
Permissions and management
The administrator has every permission and finds all of the organisation's settings under Admin. On top of that, the administrator can give individual permissions per person.
Permissions
Create and publish the schedule: add shifts, use Edit mode of the schedule and the template, and publish months.
Approve leave: approve or decline requests, and withdraw approved leave.
Manage the notice board: delete messages from the notice board.
View personal details: read the details colleagues filled in.
Approve hours, View everyone's hours and Statistics for everyone (Betalend and Maatwerk): the Everyone tab on Hours and Statistics; only the first also lets you validate the month. Give them per function, e.g. to the head of department.
Manage the department calendar: add, change and delete all calendar activities.
Create date polls: set to Everyone by default. Untick it to choose who may create a date poll.
Create votes: only the administrator by default.
Change own personal preference (Betalend and Maatwerk): set to Everyone by default. Untick it and a member enters their preference once; after that only the administrator changes it.
View evaluations (Paid): start, read and complete evaluations. Click a name under the permission to choose the groups, e.g. only GP trainee; nothing ticked means all groups.
View the schedule only: Home with the day schedule and the notice board, the work schedule, the staff list and the documents for their job title or working group. Useful for a shared login, e.g. for the secretariat.
Not on the schedule: everything except desiderata, leave, swaps, open shifts and hours, e.g. for a head nurse. Shifoor also prepares that role if you ask.
For both roles, + Job title… picks a whole job title, e.g. Verpleegkundige: whoever has or gets that job title gets the role.
Under Admin > Permissions you see who has each permission, all in alphabetical order. + Add… gives the permission to someone, the cross takes it away. That is also where you make someone an administrator or take it away.
With + Job title… you give a right to everyone with that job title, e.g. the head nurse.
Subscription: Free and Paid
Under Admin > Subscription you see which version your organisation uses and What Paid adds.
A larger organisation with its own needs? Ask about Custom at info@shifora.be.
For the administrator
Tick that you accept the terms and conditions and click Switch to Paid. You go to a secure Stripe payment page; after payment, Paid is active within a few moments.
You pay per active user. When colleagues join or leave, this is settled per day on the next invoice.
Payment details and invoices lets you change your payment details, view your invoices or cancel the subscription.
Under Billing details you enter your organisation's legal name, address and VAT number, and for a Belgian company also the Peppol ID. Shifora checks the VAT number in VIES and puts the right VAT note on the invoice. Our bank account is at the bottom of the invoice. In Custom this is also under Admin > Intake.
If a payment fails, Stripe tries again and Paid stays on in the meantime. After cancelling, your organisation goes back to Free.
If your organisation then has more than 15 people, you have 14 days to deactivate members under Team. After that, Shifora deactivates the most recently added members; their data is kept.
Settings
Under Settings (at the top, in My account) you arrange what concerns only you.
Language: Nederlands, English or Français, only for you; you already choose it on the sign-in or sign-up page, otherwise on the start screen the first time you sign in. Your emails come in that language too.
On the Personal details tab you change your first name, last name and the details your team asks for, and upload a Profile photo. Your colleagues see that photo under Team.
On that tab you also choose your preference for nights and weekends.
In Betalend and Maatwerk you also write your Personal preference for the roster on that tab.
Account: change your email address or your password, or set up two-step verification. A new email address only applies after you click the link in the confirmation email.
At the very bottom, in the Danger zone, Download my data gives you an Excel file with your own data in this organisation.
At the bottom you also find the Terms and conditions and the Privacy statement.
Below it you type your email address at Delete account and your account is removed permanently; your shifts become open shifts. Evaluations about you stay with your organisation until its retention period has passed. Are you the only administrator, first appoint another administrator or delete the organisation.
Notifications: three parts. Under Which notifications, via which channel you tick Email or Push per type, in Maatwerk also WhatsApp. Grey means the administrator turned that channel off.
Less urgent emails: messages, approved leave and hours arrive together in one email at 6 pm by default. Choose Right away for separate emails.
Push notifications: tick it for a notification on your phone or computer. On an iPhone, first add Shifora to your home screen. Push for the notice board and the open shift overview is off by default.
Weekly roster overview: administrators only. Every Monday an email with who swapped with whom, which shifts are still open, pending leave, ongoing evaluations, overtime and last week's changes; untick Email if you don't want it. If nothing happened, no email is sent.
New leave request: only for leave approvers. You get a notification as soon as a colleague requests leave, by default via email, push and, in Maatwerk, WhatsApp.
Date poll
With the Date poll you pick a date together, for example for a meeting or a rehearsal.
Click New date poll, enter a title and then choose One day, several times (one date with one or more times) or Several days (from, to and the weekdays that suit, with the times). Place is optional. If you don't see that button, the administrator gave that permission to a few colleagues only.
Enter a start time right away, optionally with an end time. With + Extra time slot every date gets more times, e.g. 9–10 am and 2–3 pm; each time is a separate option. Without a time it is a whole day. Type a date in three boxes (day, month, year) and a time in two (hours, minutes), or pick them with the calendar and the clock.
Below you immediately see how the date poll will look, with every option.
Under Single date (click to expand) you add a single date, also with its own hours, e.g. Friday at 7 pm or 7–9 pm, apart from the other times.
Shifoor creates a date poll too, e.g. "Make a date poll for the next two weeks with slots from 9 to 10 and 2 to 3 pm, only when nobody of the Masterplan working group works." He leaves out slots in which someone of that working group has a shift.
Under For whom you choose a working group (Paid and Custom). Then only its members appear under Not answered yet and get the reminder.
Share the link under Share: copy it, send it via WhatsApp or open a ready-made invitation with Email. People without an account can answer too: they only enter a name.
Tap your box to choose Yes, Maybe or No; tapping again switches. Under Best dates you see which dates suit best.
A guest without an account is recognised on the same device and can change their answers later.
On your home page you follow the provisional result of your team's open date polls.
For whoever created the date poll
Under Manage you see who in your team has not answered yet. In Paid you send those colleagues an email reminder.
Choose one or more dates and click Close; in the list, green fits best and red means someone said no. If you may manage the calendar, Add to the calendar puts the dates in right away, with the time for a slot.
After closing, anyone with the link can put the chosen dates in Google, Outlook or Apple with .
Votes
With a vote your team decides anonymously on a question, until a deadline. You find votes next to the Date poll, on the Votes tab, and on Home as long as you still have to vote.
Choose an option, click Vote and confirm. Your vote is final.
Shifora only stores that you voted, not what. Nobody, not even the administrator, sees what you chose.
You receive an email with a link. If the vote allows it, you vote through that link without signing in; so do not forward that email.
After the deadline you see the result per option and receive it by email.
Creating a vote
Click New vote, enter the question, the options and the deadline, and choose who can vote: a group or individual people.
With + Explanation each option gets its own explanation. A line starting with * or - becomes a bullet.
With Copy this vote you make a new one with the same question, options and explanation, e.g. after a test to yourself.
Three settings: vote through the email link without signing in, show the result during the vote, and an Abstain option.
On the vote you see who has not voted yet, add voters, close early or delete it. In Paid and Custom, those who have not voted get a reminder two days before the deadline.
Shifoor prepares a vote too, e.g. "Make a vote for the staff members about the new system with options A, B and C, until 15 November." Voting through Shifoor is not possible.
By default only the administrator creates a vote; they give the permission under Admin > Permissions, at Create votes.
Shifora as an app on your phone
Put Shifora on your phone's home screen. It then opens like an app, without an address bar and with the logo at startup.
On an iPhone
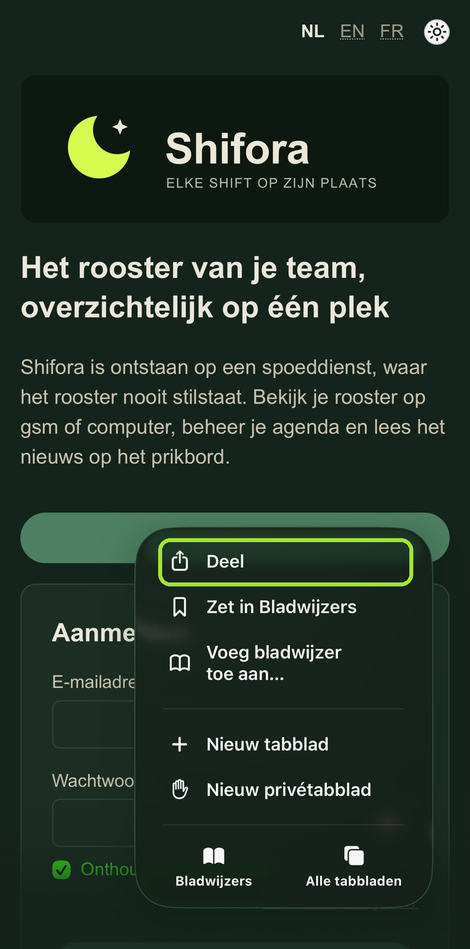
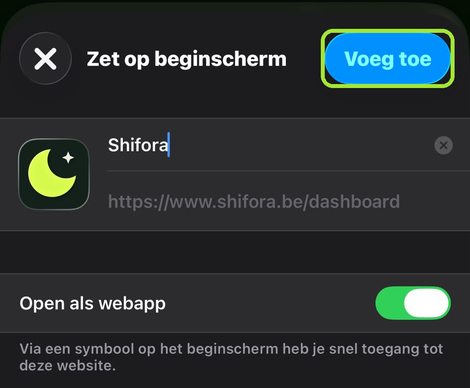
Open www.shifora.be in Safari, tap the three dots next to the address bar and choose "Share".
Choose "Add to Home Screen", leave "Open as Web App" on and tap "Add".
On an Android phone
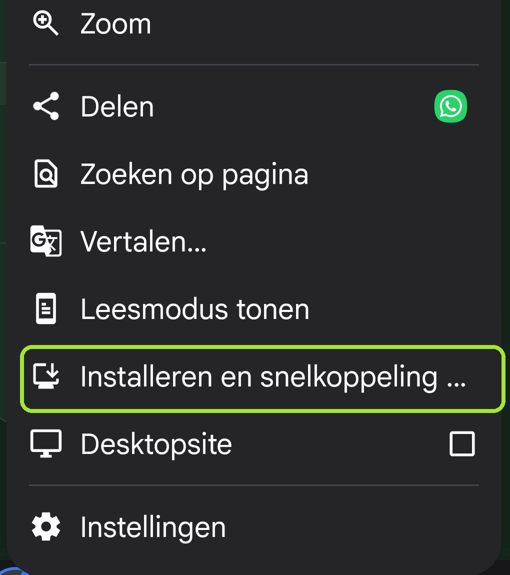
Open www.shifora.be in Chrome, sign in and tap the three dots at the top right.
Choose "Install and create shortcut" (sometimes "Install app") and then "Install".
Two-step verification
With two-step verification, Shifora asks for a 6-digit code from an app on your phone after your password. That way nobody can sign in with just your password.
Install an authenticator app, e.g. Google Authenticator or Microsoft Authenticator.
Go to Settings > Account and click Set up next to Two-step verification.
Scan the QR code with the app and enter the 6-digit code. It then shows On.
Each time you sign in again, you enter the code from the app after your password. If you stay signed in with Remember me on this device, Shifora does not ask again.
Lost your phone? Ask an administrator of your organisation to reset your two-step verification. Then sign in with your password and set it up again.
To turn it off, click Turn off in the same place.
For the administrator
In Paid and Custom, two-step verification is required for administrators. You get one month; Home shows until when. After that, Admin opens only once it is set up.
Help a colleague who lost their phone with Reset: in spoed MM under Team in the list of users, in the other plans under Team on the colleague's name. Shifoor can prepare it too.
Privacy
How Shifora handles your data is explained in the privacy statement.
Your organisation decides which data it puts in Shifora; for a question about that, go to your administrator.
You download your own data and delete your account under Settings, in the Danger zone.
Shifora only uses cookies needed to make the site work. A YouTube video only loads when you click play.
The AI rota proposal sends codes instead of names to the AI provider.
A date poll disappears 12 months after its last date, together with the replies.
Questions or problems?
Search first with the search field at the top of this help, or ask your team's administrator. The question mark at the top always opens this help. As an administrator you can let Shifora support look along through Admin > Support. You'll also find explainer videos on our YouTube channel. Shifora is a product of Massaer Digital. The terms and conditions are at the bottom of Settings and of this help.
A colleague can have several job titles: tick them at their name in Team. The first one sets the role and the default eligibility.
You remove a job title here or under Team > Manage with Delete; anyone who had it loses it.
An emergency department with the emergency starter pack indicates here whether it has GP trainees (haio), emergency medicine residents (ASO) and internal medicine residents (ASO) and students. Unchecked, their job titles, eligibility and rules disappear, except what a colleague already has; checking later brings them back.
Personal details: for each item (mobile number, date of birth, address, job title), choose whether it is Required or Optional, or choose Don't ask. The personal preference (from Betalend) is optional by default. The address consists of street, number, postcode, city and country; unit and state or province are always optional. First and last name are always required.
Requested hours per week is optional by default and shows with the member in Team; once filled in, only you change it. An emergency department with the starter pack also asks for INAMI/RIZIV number and Company.
Below it you choose the month of the Yearly reminder: every active colleague then gets an email to check their details. With the emergency starter pack that is September, as in spoed MM. In that month the notice board on Home asks too, until the colleague saves their details.
Invite colleagues: type one or more email addresses, separated by a semicolon (;), a comma or each on a new line, and click Send invitations. Done closes the wizard.
After the wizard, Home shows Your first roster: set up shifts, invite colleagues, fill in a first month and, with roster review, publish. Each step links to the right page; the box disappears when everything is done or with Don't show again.
More than one organisation
At the bottom of the Team page, Start your own organisation starts another organisation. You become its administrator and your other organisations remain.
If you belong to more than one organisation, choose which one you view at the top, above your name.
The same invitation is sent at most once every 12 hours.
Management > Messages, in every version: open Channels per message and choose per message whether it may go by Email or Push, in Maatwerk also WhatsApp. What you turn off here, a member cannot turn on in Settings.
From Paid on, you write your own invitation email under Management > Messages, per role or as the default. There you also adjust every other Shifora email for your organisation, per language, under Standard Shifora emails, grouped by category. Without your own text, the standard email applies.
In Free, members and open invitations together count up to a maximum of 15 people, across all free organisations with the same administrator; someone in several counts once. At the top of the Team tab you see how many places are already in use.
The first sign-in
Your colleague first chooses their language. If your organisation asks for personal details, they then land on My details. Only once the required fields (marked *) are filled in can they continue in Shifora.
Those details are seen only by the administrator and by whoever received the View personal details permission.
In Betalend and Maatwerk your colleague can then also enter their Personal preference (not required by default), unless you choose otherwise under Admin > Personal details. In Maatwerk students, GP trainees and residents are not asked.
If their job title isn't listed, they click My job title isn't listed and suggest one; until you decide, the job title is not required.
Managing members
The Manage tab of the Team page lists everyone, including people who are no longer active.
In the Team tab, click a name to change the mobile number, address, job, period and Work preferences.
Make admin gives someone every permission; Make regular member takes them away again.
The red Remove button takes someone out of the team; Back in team puts them back.
Click a name to see that person's permissions and the details they filled in.
In Betalend and Maatwerk you also fill in the Personal preference there (in Maatwerk not as a student, GP trainee or resident), such as "no two nights in a row". The roster takes it into account.
You also choose the Night preference and Weekend preference there; the solver takes them into account.
In Paid and Custom you also fill in the Hours per week; the solver shares out the shifts accordingly.
Change the period under Start date and Active until. Fill in an end date under Active until: the night after that day the person becomes inactive.
Validating sends nothing by itself. With Announce that the roster is validated your team gets an email, for one or more months and with your own text added. The message also stays on the notice board for two weeks.
If you then change a shift, the people involved get a message half an hour later. If you put the shift back in the meantime, nothing is sent.
If a shift has different hours than usual, whoever has it gets a reminder the day before, also after a swap. Choose the channels in Admin > Messages, under Reminder for different hours.
Does someone hold two roles at once, for example an on-call shift and a second task that overlaps in time? Then tick Allow overlapping shifts in different columns in Admin > Organisation. Two overlapping shifts of the same person in different columns then no longer turn red. That person can also take both themselves through open shifts, filling in and redistributing, and the solver may assign them together. Within the same column an overlap remains a conflict, and the other rules (such as the rest between two shifts) still apply. It is off by default; Shifoor can also turn it on or off for you.
You set the minimum rest between two shifts of the same person in Admin > Schedule setup, tab Settings. Less rest turns red and the solver avoids it. Leave the field empty to use the Shifora default; Shifoor can also set it for you.
Below it you choose how many hours someone works at most in one stretch, and how many working days and nights at most in a row. A longer run turns orange; the solver goes at most one day over when there is no other way, except for a fixed night doctor. Anyone working more than 32 hours a week may work one day longer; empty is the Shifora default.
Further down you choose how many percent someone may be off their requested hours per month, and how many free weekends per month someone gets at least and on average. The solver follows them.
Under Ceiling per role you choose per role how many percent someone may go above the requested hours, e.g. 0% for a GP trainee. Empty is the hours margin.
Under Rules per role you set the legal limits per role, e.g. at most 158 hours a month and a training day on Tuesday for a GP trainee. The solver follows them.
Under Earlier handover you choose a night column, a day column, the time and the colleagues: if their night ends on a chosen weekday, the day column starts earlier that morning, e.g. at 07:00 instead of 08:00. Whoever starts earlier gets a notification.
After a night, the next day only allows a night or an evening from 18:00 to 00:00; after such an evening, only a night or another such evening.
Assigning by instruction (Paid)
Below the roster is Assign by instruction (AI). Type in plain language what needs to happen, e.g. "assign all nights of the first week to An", and click Send.
You first see a proposal. Only Confirm and assign carries it out.
You can also ask something, e.g. "how many shifts does Jan have this month?".
Schedule rules (Paid)
In the Rules tab of Schedule, in Edit mode, you keep the rules for your roster, e.g. "at most 3 days in a row". Choose whether a rule is hard, soft or a check.
The instruction below the roster follows the active rules. Turn a rule off to stop using it for a while.
Solver (Paid and Custom)
In the Solver tab of Schedule, in Edit mode, the solver suggests how to complete the roster for one or more months, with the shifts shared out fairly. It is a help: you review it, adjust it and decide what to apply.
With Also fill open shifts the solver leaves no shift open unless nobody can do it; the messages then say so.
Choose Test to try the solver on an existing month, even a validated one: it rebuilds it with the current rules and desiderata and shows the result as a schedule grid in the same tab, below the button, with the real schedule struck through underneath where it differs, without applying anything. Below it are the same statistics as in Edit mode, for that schedule.
Click a name in the solver schedule to give all their shifts a colour; click again to remove it.
Names in the solver schedule have the colours of Edit mode: green for wants to work, orange for rather not or too long a run, red for cannot or a conflict. Drag a column by the handle ⠿ in its title; the order also applies in the regular schedule.
At the top of the result you see how certain it is (proven best, good, impossible or time ran out) and a block Check before you apply: what the solver bends or leaves as it was, and what Shifora itself sees as red in the proposal. Tick I have checked this to apply.
Untick Show struck-through names under the schedule title to hide the struck-through names; your browser remembers that choice.
Under the solver schedule, write what should be better in Note for the solver: Shifora turns it into a rule in the Rules tab. After Confirm, the solver applies that rule in every later run. A rule such as "first-call nights must never stay open" also makes the solver fill open shifts.
To keep refining: apply the result, write your note and start the solver again. A normal run starts from the schedule as it is in Shifora, not from a result you did not apply; a test run starts empty.
It follows your team's eligibility, preferences and leave. Fill in the Hours per week for each colleague in Team.
A shift that runs at 03:00 counts as a night, whatever its name. Anyone with the eligibility Nights only gets only nights.
If a personal preference says "enough early shifts compared to late shifts", that colleague gets at least as many early as late shifts.
In Paid you have 10 runs a month, of at most 10 minutes each. In Custom there is no limit; each run computes for up to 20 minutes.
You only see shifts your eligibility allows, from your start date.
Every two weeks you get an email with the open shifts, and a separate one when one falls within five days. The subject of every email starts with the organisation's name.
When a shift opens up, you get one email and it shows on Home with New for three days.
In those emails each shift has an Accept button. It opens a short confirmation; you do not need to sign in. If a colleague has already accepted the shift, it says so, and after pressing Accept you also get an email.
With Accept part in the email (Paid and Custom) you first choose the start or the end of the shift.
With Split you keep part of your shift and a colleague takes the rest. This also works for a night shift.
With Ask for a shift you ask for a colleague's shift; that colleague confirms.
In Paid and Custom you can also ask in your own words, e.g. "I give my Friday shift to An."
What you need to answer and open offers also appear at the top of the notice board on Home, with open shifts above it.
Choose one or more roles at the top to see only those colleagues. Undo reverses your last change.
The Risk column warns when many colleagues can't work or are on leave that day.
Under Submit preferences on behalf of a colleague you type e.g. "Jan can't work on 5 January".
In Schedule, in Edit mode, the preferences are in a tab next to the statistics, and the drop-down list per shift takes them into account.
Can't is a hard limit; Rather not and Want to work are preferences.
When no next deadline is set, you get a message to set one.
In All preferences each name has a dot with that colleague's traffic light.
Under Preferences > Admin you set a maximum of red preferences per month and days of leave per year, and the thresholds and weights of the traffic light.
Under Preferences > Admin you also set the deadlines: until which day your team enters preferences for a period. Every deadline appears in the calendar by itself; untick Deadline in the calendar if you don't want that.
Admin
On the Admin tab you also turn the reminder to check the hours on or off, and choose how many days before the end of the month it goes out.
With Validate the month automatically on the Admin tab, Shifora validates last month itself, the number of days after the end of the month you choose. When it is off, you validate with Validate month. A validated month shows the fluorescent green button Validated; clicking it withdraws the validation. The reminder to check the hours then disappears from the board.
Plan an evaluation
On Overview, each colleague gets a card with a timeline: notes, midway and end. Open it to see the notes first, then per evaluation the average per criterion and the comments, without names.
Someone who is no longer active and whose period has ended disappears from the list; the evaluations are kept. Open evaluations and reminders about someone who is no longer active disappear too. Search by name, or click the name in Team and then Evaluations. If you see several groups, the list is split by role.
Complete closes the evaluation; the interim notes about that colleague then become part of it.
After the deadline you get a message to complete the evaluation.
The minus sign puts the window away and keeps your conversation; under Earlier you find past conversations.
For the administrator
In Admin > Shifoor you choose per role or working group whether it sees the button and how many questions per day it may ask, or unlimited. Anyone in an unticked group does not see the button; anyone in several groups gets the most generous limit.
There you also see your organisation's monthly budget and how much of it Shifoor used this month.
Shifoor also prepares this for you, e.g. "Hide Shifoor for the nurses".
If you make the roster, Shifoor also swaps the shifts of two members, e.g. "Femke takes Josephine's late shift on 24 October". After Confirm the roster shows it straight away.
If a question fails, you see the technical reason in brackets.
+ Working group… gives a right to all members of a working group (Betalend and Maatwerk). You manage the working groups themselves under Admin > Working groups.
You can also click a name on Team, Manage tab, and choose Grant or Revoke for each permission.
You cannot revoke your own administrator rights; another administrator does that.
Admin
Organisation: name, country, preferred language, time zone, date format, time (24 or 12 hours), word for a shift and sector. Dates and times in Shifora follow that choice, and all texts use the chosen word (shift, duty, turn or rehearsal). Under Names in the rosters you choose whether the first name or the surname comes first.
Under Messages you choose email, push and in Maatwerk WhatsApp for New open shift, and for Reminder for different hours.
At the bottom of Organisation is the red Danger zone. There, Download data gives you all data of your organisation in one Excel file. While it is being prepared, the button shows Preparing….
Under Organisation you can also tick Profile photo required: Home then asks anyone without a photo to upload one. It is off for a new organisation.
Under Organisation you also choose the Retention periods: how long Shifora keeps the personal data and evaluations of people who are no longer active (by default 12 months and 5 years). After that, Shifora deletes them at night. Spoed MM keeps that data in Notion.
Under Organisation you can also switch off the AI features: Shifoor, the roster proposal and converting text then stop working, and no data goes to the AI provider.
The Danger zone also holds Delete organisation: type the name and after 14 days everything of your organisation is deleted permanently and the subscription stops. Until then only admins see the organisation, they get an email and any admin can Cancel deletion. Your colleagues keep their account and anyone who is in another organisation lands there.
Schedule setup: your roster columns and their shifts, the template and the limits of the roster. At the top you choose between a new column and a new shift in an existing column. How many people at once? sets how many people work a shift together.
Personal details: which details your colleagues fill in.
Working groups (Betalend and Maatwerk): create working groups, rename them and add colleagues, also those without an account. Under Documents you choose a working group as the audience.
Target groups (Maatwerk): choose which functions or working groups belong to it, or add someone by hand, e.g. all nurses and the Quality working group. Under Messages you choose a target group as recipient.
On these tabs every change is saved right away.
Support: Turn on for 7 days lets Shifora support look along for 7 days, read only. Every look is listed in the Log. Turn off stops the access at once, Another 7 days extends it. While it is on, Home shows it at the top, with Turn off.
Users is under Team, tab Users (Paid and Custom): how many colleagues are active, former or invited, who joined or left each month, and when everyone last signed in.
Notice board, Schedule setup and Subscription each have their own part in this help.
In Custom, the administrator can adapt this help for their own organisation with the Edit button on the help page. They can also hide a section or add their own section. Whatever is not adapted follows the general help.
Home page: tick which sections appear on your home page.
Forgot your password? On the sign-in page, click Forgot your password? and you get a link to choose a new one.
At the bottom, Start your own organisation starts another organisation.
Your roster in your own calendar
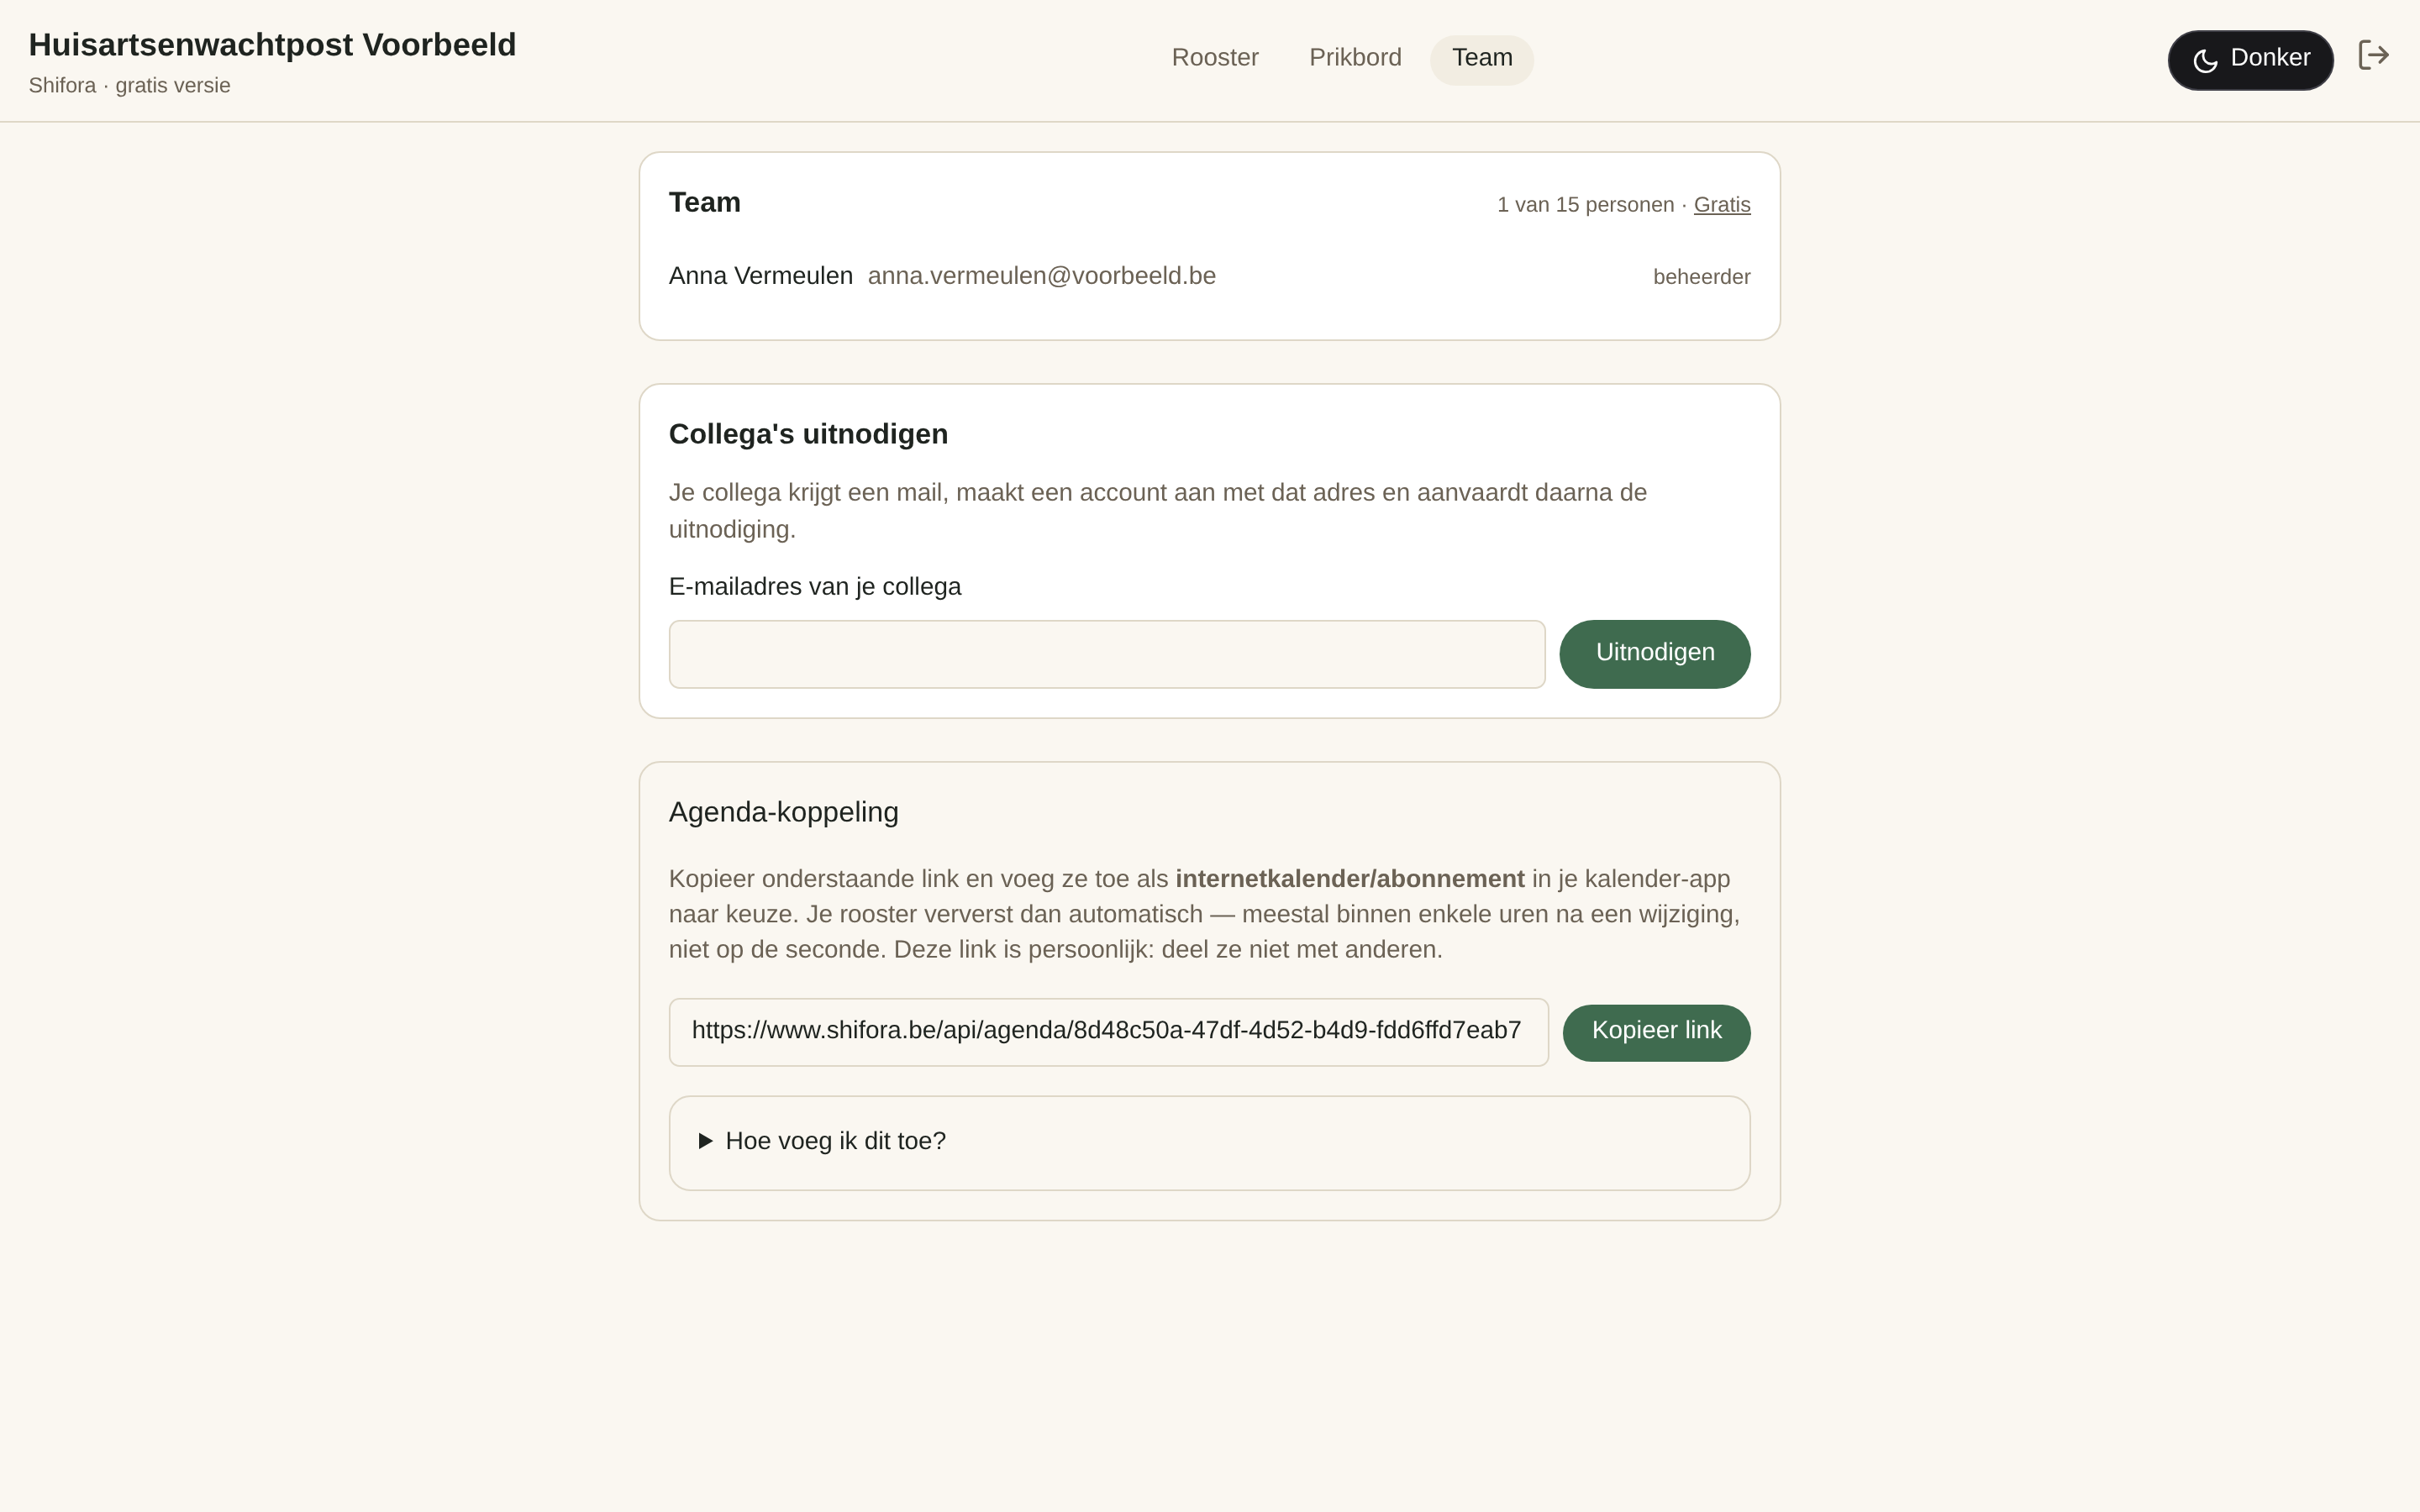
The Calendar sync block holds your personal link. Do not share it.
iPhone, iPad or Mac: click Subscribe in your calendar and confirm. If that does not work, copy the link with Copy link and add it to your calendar as a subscribed calendar.
Google Calendar: copy the link and open Google Calendar on a computer. Click + next to "Other calendars", choose From URL and paste the link. The phone app can't do this; once added, the calendar does appear there.
Outlook: choose Add calendar, then Subscribe from web, and paste the link.
You see your own shifts from published months and your team's activities, from two weeks back to six months ahead. Changes usually come through within a few hours.
If you belong to more than one organisation, the same link covers them all and each item shows the organisation's name. Untick an organisation to leave it out of your calendar.
Shared or lost the link? Click Create new link; the old one stops working and you add the new one again.
Add to your calendar
Reopen lets everyone answer again. The cross removes a participant, Delete the date poll removes everything.
The administrator can do this for every date poll of the team.
Who may create a date poll
Everyone in the team by default. The administrator can restrict it under Admin > Permissions, at Create date polls.
Only a date poll, without a schedule
At shifora.be/datumprikker you start a free space with only the date poll and votes. You only enter your name, no other details. Open the confirmation email on another device and you still go straight to your date poll.
Want to plan your team later as well? Click Plan your team and Turn on schedule; your date polls and votes stay. Shifoor becomes available once the schedule is on.